Removing window tint from your vehicle can initially seem like a daunting task, but with the right approach, it can be a manageable process. One common method is using a steamer to loosen the adhesive and carefully peel off the tint. Another option is using a solution of soapy water and ammonia to soften the adhesive, allowing for easier removal. It’s important to take your time and work patiently to avoid damaging the glass or leaving behind residue.
If you find yourself struggling, seeking professional assistance may be a wise choice. Many people have had to deal with the aftermath of a subpar installation and have turned to us for help in removing the tint. We’ve taken our expertise and compiled it into this guide to provide you with the best way to remove window tint from your vehicle.
Window Tint Removal
With our step-by-step instructions, you’ll be able to tackle this task with confidence and ensure a clean and successful removal process.
1. Roll Window Down
To begin the window tint removal process, it’s important to roll down the window slightly. This creates a small gap that allows for better access to the edges of the window tint. Rolling down the window also makes it easier to peel off the tint. By doing this, you can ensure that you have a clear working area and can easily remove the tint without any hassle. It’s a simple yet effective step in the overall window tint removal process.
2. Grab Your Steamer
When it comes to removing window tint, using a professional steamer is most effective, but a clothing steamer will also work. The first step is to apply heat to the window tint using the steamer. This heat makes the tint more pliable and easier to remove. As the steam interacts with the adhesive, it helps to loosen it, making it easier to lift and peel off the tint. By using a steamer, you can simplify the removal process and ensure that the window tint comes off smoothly. It’s a great option for those looking to remove window tint without damaging their windows or spending too much time on the task.
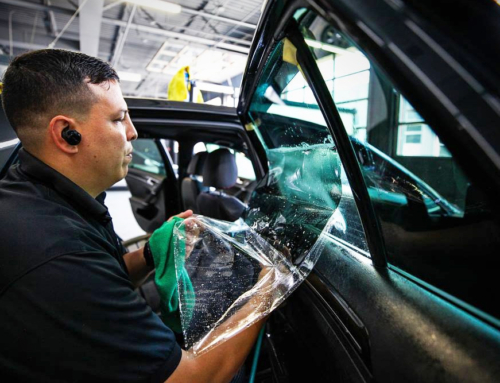
3. Start Peeling (Be Careful)
To begin removing the window tint, carefully lift and peel the corner using a razor blade. Take your time as you work your way around the edges, gradually peeling off the tint from the window. Remember, it’s important to approach this step with caution to avoid any damage to the window itself. By using a razor blade, you’ll have more control and be able to remove the tint more effectively. Take your time and make sure to peel slowly to ensure the best results.
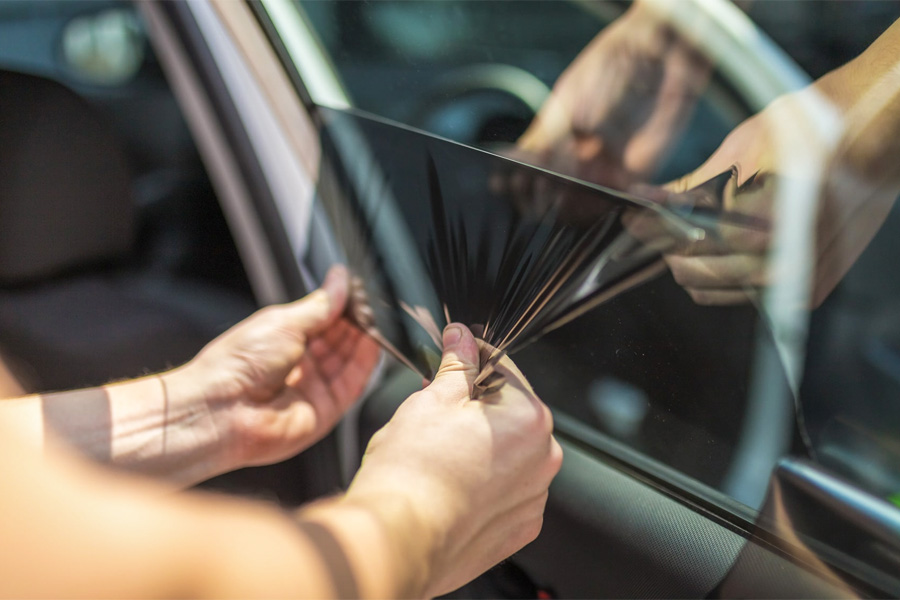
4. Slowly Start Pulling
Once you have successfully lifted the corner of the window tint, it’s time to carefully and gradually pull it off. Make sure to do this slowly and evenly to avoid any potential tearing or damage to the window or defroster. Taking your time during this step is crucial to ensure a smooth removal process. By pulling the window tint away from the window with patience and care, you can prevent any unwanted mishaps and achieve a clean removal. Remember, it’s important to be mindful of the window and defroster while pulling off the tint.
5. Remove Glue Residue
To remove any remaining glue residue after removing the window tint, you can use adhesive remover. Gently wipe away the residue by either using a scraper or a cloth soaked in adhesive remover. This step is important to ensure that the window is clean and free from any sticky residue. By using the adhesive remover, you can effectively remove the glue residue without damaging the window or the defroster. Take your time and use gentle motions to ensure a thorough removal of the residue.
Alternate Window Tint Removal Methods
If the steaming method is not suitable, there are other options for removing window tint. These alternate methods include using a heat gun or hair dryer, ammonia solution, or razor blade. It is important to exercise caution and use the right tools to avoid damaging your vehicle. Before attempting any of these methods on the entire window, it is recommended to test them on a small area. This will help you determine if the method is suitable and prevent any potential damage. Remember to always follow the proper steps and take your time when removing window tint.
Heat Gun / Hair Dryer
To remove window tint using a hair dryer or heat gun, gather necessary supplies like a razor blade, cleaning solution, and a hair dryer or heat gun. Warm up the tint with the hair dryer or heat gun to make it easier to peel off. Use the razor blade to lift and slowly peel off the tint, being careful not to damage the window. After removing the tint, clean the window thoroughly and remove any remaining adhesive using a cleaning solution and a clean cloth. If there are multiple layers, repeat the process.
Ammonia Solution
To remove window tint using ammonia, soap, and water, gather the necessary supplies: ammonia, soap, water, and a razor blade. Start by spraying the ammonia mixture onto the window tint and covering it with plastic wrap to let it soak for a few hours. Afterward, remove the plastic and use a razor blade to carefully peel off the tint. To eliminate any leftover adhesive residue, create a mixture of soap and water and apply it to the area. Take caution during the process to ensure no damage occurs to the window or surrounding areas.
Razor Blade
To remove window tint using just a razor blade, gather the necessary materials: a razor blade and a soft cloth. Start from the corner of the window and use the razor blade to lift the tint film. Slowly and carefully pull off the tint film in a horizontal direction. After removing the film, use a cloth and an ammonia solution or window cleaner to remove any leftover adhesive residue. Repeat these steps for all windows with tint film that needs to be removed.
Professional Window Tint Removal
When it comes to window tint removal, considering a shop that specializes in window tinting is often the best option. Hiring a reputable tint shop ensures that your windows won’t be damaged in the process. Take the time to research local companies and read reviews to find one that meets your needs. Ask for a quote and inquire about their process and equipment to ensure they have the necessary expertise. It’s also important to verify that the company is licensed and insured for your protection. Once the tint is removed, follow any aftercare instructions provided by the professional to maintain the integrity of your windows.
Removing Window Tint
In conclusion, removing window tint from your car can be a straightforward process if you follow the right steps. Whether you choose to use a steamer or a razor blade, make sure to take your time and be patient while peeling off the tint. Remember to remove any residue left behind by using a glue remover or a mixture of ammonia, soap, and water. If you’re unsure about tackling this task on your own, it’s always a good idea to seek professional window tint removal services. They have the expertise and tools necessary to safely and efficiently remove the tint without damaging your car’s defroster or windows.